Web development is an interesting beast, with no "wrong" way to approach it. There are standards and general guidelines, but one look at Neocities makes it clear they're not mandatory. In fact, if you're wanting your page to be more stylish and expressive, those standards might get in your way. All this is to say you can create your site however you want! With that said, it's worth keeping in mind how you'll add onto or change your site in the future. For that I recommend employing the use of Markdown and Static-Site Generators. They're great tools that make working on your site easier, and while they are more complicated compared to regular HTML, I've personally found the amount of time they save to be worth in the end.
Before I get into the thick of things, I should preface that this article will involve programming and getting your hands dirty with the command line. It's avoidable for Markdown but inevitable for Static-Site Generators, given how they work. If you're going to continue reading I'll assume that you're comfortable with a little bit of programming, which I'll keep as minimal as I can. I'm also assuming you have a lot of content to go over in your site, and will immediately concede the ground that if you're doing microblogging using a generator might be overblown.
Plain Ol' White Bread
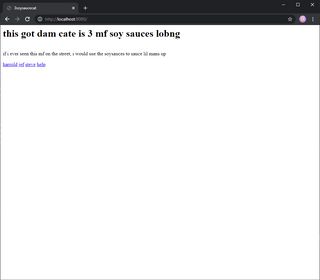
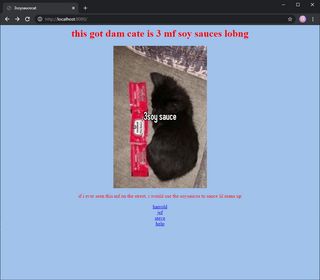
Starting off, let's elaborate on that "add onto or change your site" comment I first made. Without Markdown or Static-Site Generators this has to be done manually, which can raise a few problems depending on the site. For the duration of the article, we'll be referencing this site right here:
Right now, all it has is a few posts and an index page that links them all together. Each post is structured the same within their HTML, and all pages use one CSS file thats linked in the <head> tag. It's the HTML equivalent of white bread. But what happens when we want to add a new post?
We would need to both edit the index to link to our new post, and create the post either from our site's template (assuming we made one) or from scratch. It's nothing too bad, especially if you set it up once and never touch the page again. For most people this will work fine and there's no need to worry about it, but if you're regularly creating new posts for your site it might be fairly monotonous.
The real problems kick in if there's an element used across your site that you need to update. In this example it's a typo in the post template for the site, but this could be anything from a incorrect <meta> tag in the head to a bulk update of links.
Adding salt to the wound, this is the worst case scenario; needing to manually edit every post on the site to apply a template change. Scaling this up, the inability to do bulk changes is problematic if you want to overhaul the entire structure of the website as it locks you into your initial HTML[1]. Much like white bread, regular HTML isn't something you should be having if you're really pushing to be healthier. Enter Markdown and Static-Site Generators, which are more like whole wheat bread. With them we're able to make site sweeping changes to our HTML without having to manually change every page, and adding posts to our site becomes hassle free.
A Loaf of Markdown
If you ever formatted text on Reddit or Discord, you've used Markdown. It's a simple, yet effective method for writing rich text online that's used due to how simple it is. Depending on how you want to use Markdown, it's easy to set up as well! We'll go over two different approaches and apply them to the example site. In both cases, we'll use this markdown file.
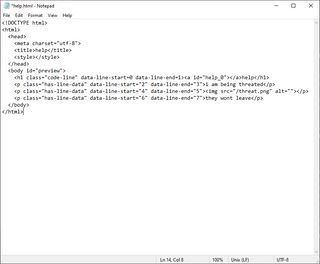
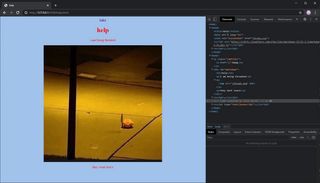
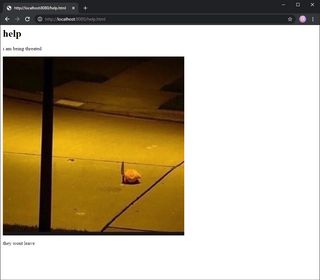
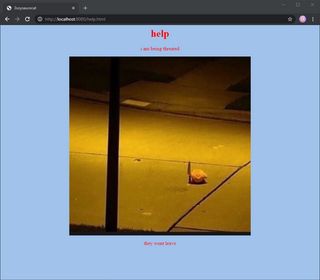
# help
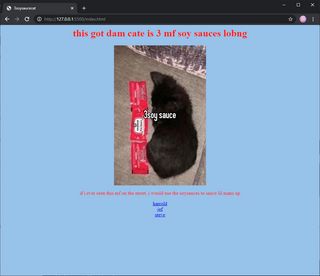
i am being threated

they wont leaveThe Simple Way: Export to HTML
The simplest way to use Markdown is to export it as HTML. For those interested in microblogging that continued reading, I recommend taking a look into this. You can use a service like Dillinger to export your Markdown text into HTML, as well as preview of what your text will look like formatted. Other options include dedicated writing apps like iA Writer, which offer the same functionality. Once you exported your Markdown into HTML, you're done! Copy the code into another HTML file or expand it further with CSS. From this point it's up to you! For reference, our exported HTML code looks like so:
The Overly-Complicated Way: Live Parsing
Another option you have for Markdown is to parse live on the page. This involves a mess of multiple components, but the advantage this method has is having your Markdown changes reflected on your website without the need to export.
First, we need to get a parser that works under Javascript. For this example we'll be using Markdown-It, but you can use whatever parser you want! Some other options worth looking at are Showdown and Marked. Make sure you call the parser you're using in your HTML, preferably within the <head> tag.
<script src="https://cdnjs.cloudflare.com/ajax/libs/markdown-it/12.3.2/markdown-it.min.js"></script>
<!--You may find it easiest to call the parser from a CDN as I've done here-->
While we're in the HTML, lets include a container for the Markdown to go into. We'll create a <div> with the attribute id="markdown" to call in our Javascript.
<div id="markdown"></div>Next, we need to parse the file. To do that, we need to utilize AJAX - more specifically, an HTTP Request - to grab the file from our site's file directory, convert it into HTML using our parser of choice, then output the result into the previously designated container. You see how this is overly-complicated yet?
Create a new <script> tag within the HTML document's <head>, or create a Javascript file and link to it in your HTML. We'll dump the following spaghetti function into it:
function ajaxMarkdown(fileRequest, targetId) {
	// Declarations
	var httpRequest = new XMLHttpRequest();
	var converter = window.markdownit();

	// Send a request for file within our site's directory
	httpRequest.open("GET", fileRequest);
	// If the server found the file, go ahead with the function
	httpRequest.onreadystatechange = function () {
		if (
			httpRequest.readyState === XMLHttpRequest.DONE &&
			httpRequest.status === 200
		) {
			// Render the Markdown as HTML and insert it in the target container (CHECK YOUR PARSER'S DOCS)
			document.getElementById(targetId).innerHTML = converter.render(
				httpRequest.responseText
			);
		}
	};
	httpRequest.send();
}
Finally, we need to call our function with the file we want displayed and it's target container. Create a <script> tag at the end of your <body> and give it the following:
window.onload = function () {
	ajaxMarkdown("/file.md", "markdown");
};
And there we go! More than double the work for the same result! Except not quite, because we do have greater flexibility with this method. While we still need to manually create and alter HTML files, they serve as an interchangeable template that we're free to change as long as we're consistent about how we use them. Assuming everything is working correctly, all we need to do to change a post's contents is to update the associated Markdown file.
Static-Site Bakeries
Static-Site Generators take the premise we had with our last Markdown example and amplifies it to the whole website. Instead of filling reserved space with parsed Markdown, we can fill it with additional HTML. This creates modularity in our site, which makes it easier to edit elements in the future. It can also be ignored and treated like regular static page depending on what you want to create. This modularity leads into the catch that Static-Site Generators are an engine for compiling sites, rather than something that can run live like our complicated Markdown example. What the generator does is take your template files and parses them into a complete site that's ready to be deployed.
As an example, we'll overhaul our example site to be compatible with Eleventy, a Static-Site Generator that runs in Node.js. If you don't already, make sure you have node installed.
A Note on Generators
Generators can be a hassle to use, especially if you're uploading the files manually to something like Neocities. Not only that, but there is also a lot of generators to choose from, and with that comes some decisions. I chose Eleventy for this example because it's what I understand and it doesn't force a template. That last reason is important because Static-Site Generators can force developers into designing their sites a certain way depending on how they work. I mention this because Neonaut recently rejected SSG's all together because using a generator was giving them too many problems.
I was thinking about why I never update my site anymore, and a big part of the problem is the static generated site still feels like way too much stuff. It's enough of a hassle to generate the site and upload it, and things break (I've been putting off fixing some Hugo template errors for 7 months now...).
They're not alone. Nicolas Hoizey finished off their explaination on how their site works with mentioning how "Publishing new content has become more complicated[...]." Depending on how you're hosting your site there's ways to make publishing easier, but that's outside the scope of this article. This is also outside our scope but worth mentioning: your choice of generator should be dependent on what your project is trying to accomplish. In our case, we're making a standard HTML site but adding modular elements. That's perfect for Eleventy.
Setting Up Eleventy
Create a new folder and open it up in the command line. Once there, input these commands:
npm init -y
npm install --save-dev @11ty/eleventy
npm init -y initializes a package.json file for us, which is required for installing Eleventy into the project's folder. npm install --save-dev @11ty/eleventy installs Eleventy into our project folder while also saying "I only need this package for development." At this point, you will want to open your package.json file to tweak a few things. Edit the file so that under "scripts" it looks like this:
"scripts": {
  "build": "eleventy",
  "start": "eleventy --serve"
}
What this does is create two new commands for us to use; one we can use when automatically deploying the site later on (npm run build) and another for instantly seeing the changes we've made during development (npm start). From this point we can run npm start, open up localhost:8080 in our browser and see how our site looks like served with eleventy!
Yeah, that's not looking too pretty. Making matters worse, all our links to internal pages are broken, too. But don't worry, we'll cover why this all happened. For now, appreciate that your website is now compiling under Eleventy!
Configuring Eleventy
There's a lot to customizing Eleventy depending on what you're wanting to do. Our scope is going to remain simple for now, sticking to fixing the issues regarding our stylesheet and our links. Before we do that, let's understand how they even got broken in the first place.
If you look in the project folder, you'll notice a new folder named _site. This is what Eleventy outputs once it compiles your site. Right now we haven't given it anything to compile, so it's literally just coping our HTML files.

Not only that, each HTML file gets it's own folder with an index page. This is a special trick that creates extension-less URL's, which is seen as best practice. With that all in mind, how do we configure Eleventy to our projects needs?
Keeping the .HTML
Starting off our configuration, there's a trick to getting file extensions back utilizing Eleventy's Data Cascade[2]. For reference, the Data Cascade is how Eleventy takes in data to use within a project's templates. In our case, we'll be utilizing Directory Data Files to bring back file extensions.
Create a new folder and name it anything (for this example I'll use "pages"). Within that folder, create a JSON file with the same name (That means I would create pages.json), and give it the following:
{
	"permalink": "streamlining-web-development.html"
}
There's a lot going on at once, so lets break it down.
- "Directory Data Files" apply data to a whole folder. Any Markdown or HTML we have in the same folder will have this metadata for Eleventy to munch on during compiling.
- "permalink" sets the expected URL for a page.
- "page.fileSlug" is a variable that gives information on the current pages file name.
- We call "page.fileSlug" with double curry braces to use the variable in our "permalink". We'll talk about how that works later!
Now for any HTML files we have in our "pages" folder, those pages will have a .html extension at the end of our URL's! Move all your pages into the "pages" folder except for your index.html[3].
Passing Through Files
The reason our CSS file didn't get copied into the _site folder during build time is that Eleventy doesn't recognize these file types as templates. By default, Eleventy only focuses on compiling what it considers template files, which consist of HTML (including "spiced" variants) and Markdown. Anything else is left out, with the assumption that it shouldn't be touched. We can change this behavior, and a variety of others, by creating a new file within our project; .eleventy.js.
The .eleventy.js file allows you to configure Eleventy to your sites needs. There's a lot that can be done here, but we'll be focusing on copying over our CSS and image files. Feel free to take a look through the documentation to see what else you're able to do, though! For whatever you plan on doing, however, .eleventy.js needs to follow this format:
module.exports = function (eleventyConfig) {
	//Insert Javascript Here
	return {
		//Insert JSON Here
	};
};
Let's get our images and CSS copied over. In the JSON section, have it return the following:
return {
	templateFormats: ["html", "md", "css", "png", "jpg"],
};
This tells Eleventy what files types are in use so they can be compiled and copied into the _site folder. Like mentioned previously, Eleventy by default includes HTML and Markdown files. What we've done is tell Eleventy to also include css, png, and jpg files. These files aren't compiled in any way, but instead copied over into the _site folder. With that, we now have our styling working again!
Of course, if you have other file types in use on your site, you can include them in the templateFormats list as well.
Utilizing Templates
Now that our site is working like it used to, lets add some templating to it! In the root of your project folder, make a new folder called _includes. This folder is what's called on by other files when they request a template.
I briefly touched on it already, but template languages are "spices" of HTML that make it function similarly to scripting languages. If it's built in Javascript, template languages can also take advantage of any data within a Javascript object and bring it into the HTML[4]. We've already used Nunjucks when we set our pages permalinks, so we'll stick with it.
Create a new HTML file, and title it base.html. This will be our base template that everything on our site stems from. Edit the file as if you were creating a new page for your site but don't add anything to the <body> tag. There we'll put in a bit of Nunjucks notation with ``. This tells Eleventy during build time that for pages that reference base.html as their template, this is where their content goes. For our example, this is how the base looks:
<html>
<head>
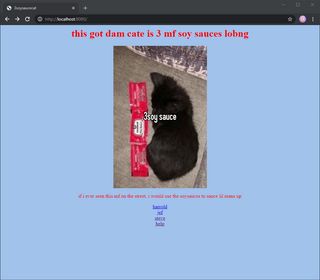
<title>3soysaucecat</title>
<meta utf-8 lang="en" />
<link rel="stylesheet" href="/styles.css" />
</head>
<body>
{{ content }}
</body>
</html>
With our base.html set up, lets use it in our index page! At the top of the file, type out two rows of three dashes spaced apart.
---
---
This is YAML, which is treated the same as JSON during build time. All we need to do here is say "We want to use our base template." Luckily, that's easy to do.
---
layout: base.html
---
That's it! What we want to do now is cleanup our index page so that it only has our body content in it. We can also include the same YAML in our Markdown file to give it proper styling.
Here's what we had before...
And this is what we got now!
One thing we're missing though is our button for post navigation, but that's easy to fix with another template. In the _includes folder, create a new HTML file called post.html. Start it off with the same YAML we've been using for our other pages, because why rewrite our base template when we can reuse it? Copy in our button's tags, follow it with a {{ content }} in the line below and we're done! For reference, this is how my code looks:
---
layout: base.html
---

<p class="captions"><a href="/">bagk</a></p>
{{ content }}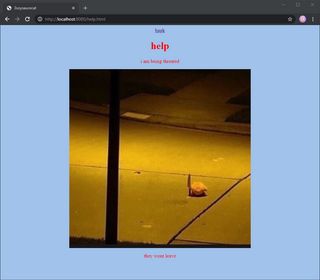
Automatic Index
As a finishing touch, let's quickly set up our posts to automatically appear on the index. We can do this with Eleventy's Collection dataset. First, we need to extend the JSON in the pages folder to set a tag for any HTML or Markdown in there.
{
	"permalink": "{{ page.fileSlug }}.html",
	"tags": ["post"]
}
With our tag set, we can now call it when we want a list of our posts. To do that, we can bring it into our HTML like this:
{% for post in collections.post %}
<a href="{{ post.url }}">{{ post.fileSlug }}</a>
{% endfor %}
Let's break this down.
- We're using Nunjucks to iterate over our post list; it's set up as a
forloop for anything taggedpost. - Within our anchor tags, we're calling for the
urlandfileSlugof a post. Think back to when we were setting up our.htmlextensions. - To properly end the loop we need to include
{% endfor %}, otherwise Nunjucks will produce a templating error and Eleventy will not compile our site.
Checking on our index page, it appears to be working perfectly!
Okay, Now You Can Pass the JAM (Conclusion)
That's it! We streamlined the development of our small site! It should be easier to update it with new posts or change its layout as time progresses. And the best part is that this is the surface of what you can do with Eleventy. It's a flexible tool that extends HTML while maintaining creative freedom, allowing you to create a formal looking blog or just make linking new posts on your creative site much easier. Overall, I hope this wet your appetite to try Eleventy out or at least didn't seem like a major leap.
One of the reasons I wanted to write this article is that I found it overwhelming to learn about Static-Site Generators. That's because when people talk about them they often coincide with a discussion on the Jamstack, a workflow for web development that focuses more on building dynamic sites without the bloat of a server network. Instead, Static Site Generators like Eleventy are used to create pages ahead of time, compiling them with data from Javascript and APIs. The name Jamstack comes from this relationship, with Static Site Generators making the Markup of the site and thus completing the JAM acronym.
If you're looking to do more with your site than just a simple blog, it's worth diving deeper into the Jamstack to see what you're able to do. But if your like me and just want a site that's simple to update and is fun to poke around with, you only need to worry about the Markup. And while we just took care of that, theres other features in Eleventy that are well worth exploring and learning about like RSS Feeds. At the end of the day though we baked a loaf of bread with a different type of flour. Bread is bread, and in the same vain whatever method you choose to make your website is fine. I just noticed recipes asking for strawberry jam in the dough and had to ask "That's a bit too soon, don't you think?"
I say structure instead of design because with the use of CSS you can drastically change the design of your webpage without altering the HTML. Still, changing the HTML may be needed for your planned redesign. ↩︎
Credit to Peter deHaan for their showcase of dynamic permalinks in action! ↩︎
Moving your
index.htmlinto the "pages" folder will rename the file to your folders name at build time. ↩︎I'm putting a "citation needed" here since this isn't an area I've explored deeply. If you know more about templating languages in this regard, please let me know! ↩︎